
Downtips gives you the best way to get Microsoft Snip Free for Windows. You can download it here from the link given below:
Microsoft Snip is the Best Free Screen Capture. Microsoft Snip, also known as Snip & Sketch, is a screen-capturing and annotation tool developed by Microsoft for Windows operating systems. It allows users to capture screenshots of their desktops, annotate them with various tools, and share them with others.
Capturing Screenshots:
- Capture Modes:
- Snip offers different modes for capturing screenshots: rectangular snip, freeform snip, window snip, and full-screen snip.
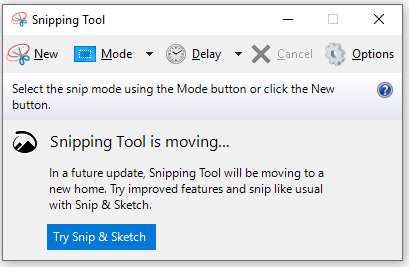
- Using Snipping Tool (Older Versions):
- In older versions of Windows, you can access Snip & Sketch by pressing the
Windows Key + Shift + Sshortcut or by searching for “Snipping Tool” in the Start menu.
- In older versions of Windows, you can access Snip & Sketch by pressing the
- Using Snip & Sketch (Windows 10 and later):
- On Windows 10 and later, Snip & Sketch is the default screen capture tool. You can access it by pressing the
Windows Key + Shift + Sshortcut or by searching for “Snip & Sketch” in the Start menu.
- On Windows 10 and later, Snip & Sketch is the default screen capture tool. You can access it by pressing the
- Selecting Area:
- Once you activate Snip & Sketch, click and drag to select the area of the screen you want to capture in rectangular or freeform mode.
- For window snip or full-screen snip, simply click on the window or press the “Print Screen” key respectively.
- Saving Snips:
- After capturing a screenshot, the snip is automatically copied to your clipboard. You can paste it into an application like Paint or Word, or you can save it directly from the Snip & Sketch app.
Annotating Screenshots:
- Pen, Highlighter, and Eraser:
- Snip & Sketch allows you to annotate your screenshots using a pen, highlighter, and eraser tool.
- Select the desired tool from the toolbar and use your mouse or touchscreen to draw or highlight the screenshot.
- Color and Thickness:
- You can customize the color and thickness of the pen and highlighter strokes by clicking on the respective options in the toolbar.
- Text Tool:
- Snip & Sketch also includes a text tool for adding text annotations to your screenshots.
- Click on the text tool in the toolbar, then click on the screenshot where you want to add text and start typing.
- Undo and Redo:
- If you make a mistake while annotating, you can use the undo and redo buttons in the toolbar to revert or reapply changes.
Sharing Screenshots:
- Clipboard:
- Snips are automatically copied to your clipboard after capture, allowing you to paste them into other applications like emails or documents.
- Save and Share:
- You can save annotated screenshots directly from Snip & Sketch to your computer by clicking on the save button in the toolbar.
- Additionally, you can share snips directly from the app by clicking on the share button and selecting the desired sharing option.
Advanced Features:
- Keyboard Shortcuts:
- Snip & Sketch supports various keyboard shortcuts for capturing screenshots, switching between tools, and navigating the app.
- Settings:
- Snip & Sketch offers customizable settings for adjusting capture and annotation preferences, such as default snip mode, pen thickness, and more.
- Integration with Windows Ink Workspace:
- Snip & Sketch integrates with Windows Ink Workspace, allowing you to access it from the toolbar and use additional ink-related features.