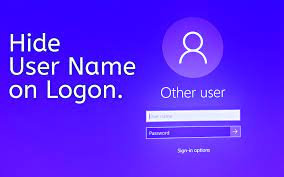
You may be willing to share your computer with your family members and friends. But Windows 10 by default will list every user account on the sign-in screen and you may want to keep some of them secret for other reasons. In This post, we guide you on How to Hide a Username From The Login Screen in Windows 10.
Hide Specific Username from the Login Screen
You may have set up no less than one user account on your Windows 10 computer. But you do not want the person who borrows your computer to use one of the accounts. Let’s see how to hide user accounts from the login screen on Windows 10.
Stage 1: Get the Full Name of Your User Account
To complete this work, you need to get the full name of the user account you want to hide from the login screen first.
Here is the tutorial on checking the exact name of the user accounts.
Step 1: Press the Windows key and R keys on the keyboard simultaneously to call out the Run window.
Step 2: On the Run window, please type netplwiz and click the OK button to launch User Accounts.
Step 3: Select the user account you want to hide and click the Properties button.

Step 4: Copy the user name on the newly popping-up window to Word or a place you prefer.
Now you have gotten the exact name of the user account you want to hide, and you can move to Stage 2 to complete hiding this account from the login screen.
We Guide You to:
(How to Hide Your Username From The Login Screen in Windows 10)
Stage 2: Hide the User Account from Login Screen via Registry Editor
To complete this work, you need to make some changes in Registry Editor. This may be risky if the changes are not done properly.
Here is the tutorial on how to hide specific user accounts from the login screen.
Step 1: Call out the Run window and then type regedit and click the OK button to launch Registry Editor.
Step 2: Look at the left pane of the current window and navigate to the path below.
HKEY_LOCAL_MACHINE > SOFTWARE > Microsoft > Windows NT > CurrentVersion > Winlogon
Step 3: Right-click the Winlogon and select New > Key. Name the key as SpecialAccounts.
Step 4: Right-click the SpecailAccounts key and select New > Key to create a key named UserList.
Step 5: Expand the UserList key, right-click the space in the right pane, and select Next > DWORD (32-bit) Value.
Step 6: Name the DWORD as the name of the user account that you want to hide (the name you have copied in Step 4 in Stage) and set its Value data to 0.

After completing the above steps, your user account should be invisible on the login screen. Apart from the screen, the account is also hidden from the switch user menu in the Start menu, from the Control Panel, from the Settings app, etc.
If you want to show the hidden user account on the login screen again, you need to change the Value data of the account from 0 to 1 in Registry Editor.